-
 ×
×
- Home
- Art Prints ▸
- Artists ▸
- Categories ▸
- Art Styles ▸
-
Picture Frame ▸
- All decorative frames
- Baroque decorative frames
- Simple decorative frames
- Rustic decorative frames
- Floating frames
- Golden decorative frames
- Silver decorative frames
- White decorative frames
- Black decorative frames
- Wood-look decorative frames
- Shabby chic decorative frames
- Thin decorative frames
- Thick decorative frames
-
Print Media ▸
- All print media
- Canvas Leonardo (satin)
- Canvas Salvador (matte)
- Canvas Raphael (matte)
- FineArt Photo Matte
- FineArt Photo Satin
- FineArt Photo Baryte
- FineArt Photo Glossy
- Watercolor Paper Munch
- Watercolor Paper Renoir
- Watercolor Paper Turner
- Watercolor Paper Dürer
- Natural Line Hemp
- Natural Line Rice
- Kozo White, 110g
- Kozo Natural, 110g
- Inbe White, 125g
- Unryu, 55g
- Bamboo, 110g
- Premio Unryu, 165g
- Murakumo Natural, 42g
- Bizan Natural, 300g
- Bizan White, 300g
- Aluminum composite 3mm
- Acrylic glass 5mm
- Order Sample Set
- Which print medium is right for you?
Canvas
Photo Paper
Watercolor Board
Natural Line
Japanese Paper
Special Media
More information
-
Help & Service ▸
- Contact us
- Sell your art
- Frequently Asked Questions
- Job Openings
- Complaint
- Order Samples
- Order Vouchers
- Shipping costs
- Production time
- Sustainability
- Image research
- Special requests
- Who are we?
- Pricing policy
- Company policy
- Quality promise
- Stretcher frame
- Mats
- Decorative frames
- Glazing
- Fillets
- Mounting systems
- Print media
- Care tips
- Legal Notice
- Terms & Conditions
- Privacy Policy
- Right of Cancellation
Info & Service
More information
Good to know
Legal information
- Shop ▸
- Contact





 View in 3D / AR
 Add to favorites
 Change wall color
 View picture in a room
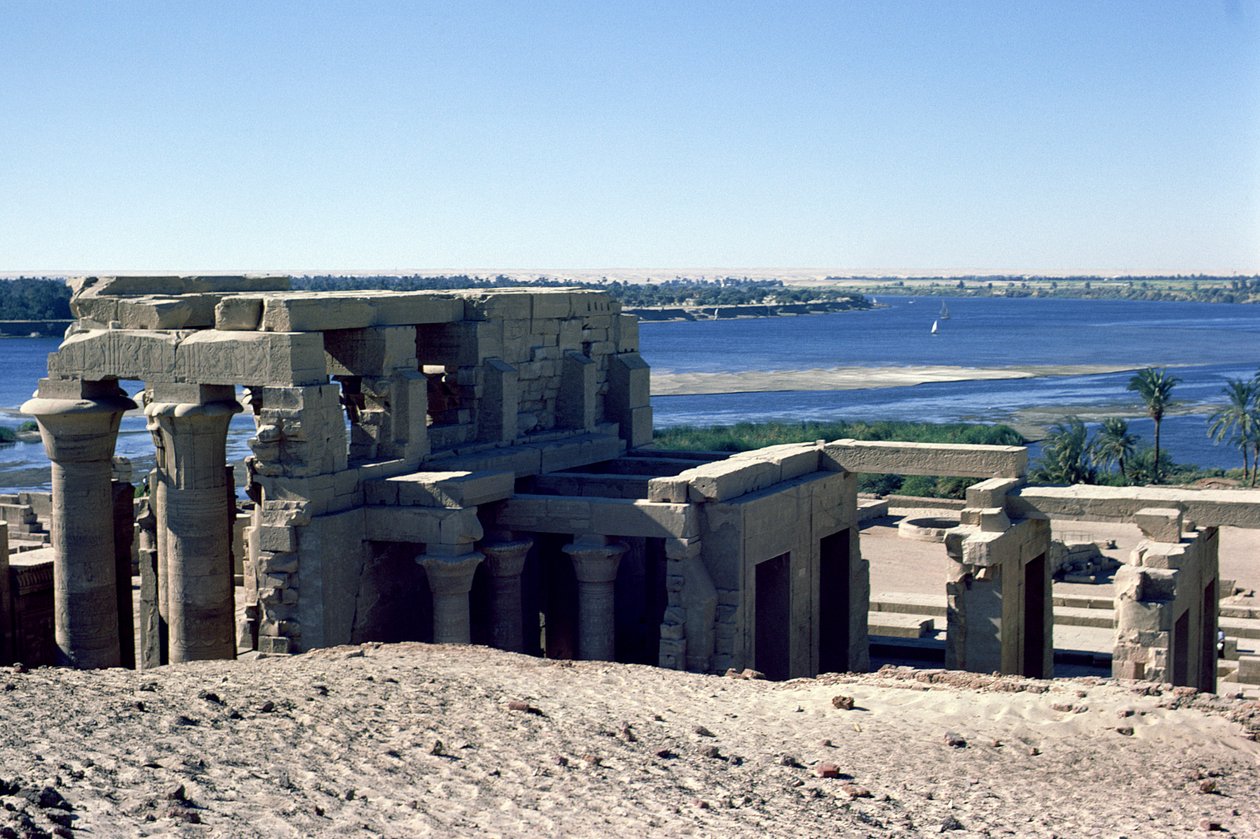
.jpg "View of the Temple of Kom Ombo, 2nd Century BC, Aswan, Egypt")
_Neagle_-_Egypt_Dandarah_(Dendera)_Temple_of_Hathor_-_(MeisterDrucke-1083162).jpg "Egypt, Dandarah (Dendera), Temple of Hathor")
_Roman_emp_-_(MeisterDrucke-1021266).jpg "Egyptian Antiquity: Kiosk of Marcus Ulpius Trajanus (Trajan)")
.jpg "Exterior view")
.jpg "View of the Roman and Ptolemaic Double Temple of Sobek and Haroeris on the River Nile")
_Roman_emp_-_(MeisterDrucke-946284).jpg "Egyptian Antiquity: Kiosk of Marcus Ulpius Trajanus")
.jpg "The Temple of Sobek and Haroeris")
.jpg "The Little Temple of Tuthmosis III")
_flanking_the_walls_of_the_Second_C_-_(MeisterDrucke-420267).jpg "Osiride figures of Ramesses II flanking the walls of the Second Court, New Kingdom")
.jpg "Columns of the Temple Dedicated to Hathor, Denderah, Egypt")
.jpg "Ancient Thebes")
 flanking the w - (MeisterDrucke-409744).jpg "Osiride figures of Ramesses II flanking the walls of the Second Court, New Kingdom")
.jpg "The Temple of Hathor in Denderah, Egypt")
.jpg "View of the First Pylon of the Temple of Horus")
.jpg "Kiosk of Philae")
.jpg "View from the top of the first pylon showing the fallen colossus of Ramesses II in the First Court")
.jpg "Ruins of Coptic Church near Hathor Temple, Dendera, Egypt")
.jpg "Temple of Kom Ombo, Egypt")
.jpg "View from Philae, Looking North")
.jpg "Aerial View of the Temple")
_-_(MeisterDrucke-980498).jpg "View of the Nile Valley from the Necropolis")
.jpg "Temple Ruins, with Nile in Background, Qasr Ibrim, Egypt")
.jpg "View from Philae, Looking North")
.jpg "The Colonnade of Amenhotep III, Temple of Luxor, Egypt")
.jpg "Philae")
.jpg "Egyptian Antiquity: View of the Arch of the North Gate, Temple of Hathor, Denderah, Egypt")
.jpg "Temple of Hathor, Dendera, Egypt, 20th Century")
_dedicated_t_-_(MeisterDrucke-947063).jpg "Egyptian Antiquity: View of the Entrance to the Temple of Edfu Dedicated to the Divinity Horus")
.jpg "Ile de Fileh Philae, East Building - Lateral View from Point D")
.jpg "Detail of a relief, Bastet stone")
_-_(MeisterDrucke-254860).jpg "Isis suckling the infant Horus")
 - (MeisterDrucke-215059).jpg "Facsimile copy of the Edwin Smith Medical Papyrus, original dating from c. 1600-1500 BC")
.jpg "Jesus and Menas in a sixth-century icon")
 - (MeisterDrucke-248918).jpg "Rag doll, 350-60")
_-_(MeisterDrucke-232851).jpg "The Weighing of the Heart, detail from a page of the Book of the Dead")
 Egyptian faience scarab amulet Second Intermediate Period 13th-17th Dynasty c1650 BC green feldspar scarab amulet Late Period 26th Dynasty c600 BC - (MeisterDrucke-193868).jpg "(L-R) Egyptian faience scarab amulet, Second Intermediate Period, 13th-17th Dynasty, c. 1650 BC; green feldspar scarab amulet, Late Period, 26th Dynasty, c. 600 BC")
.jpg "Statuette of the goddess Taweret, a hippopotamus with crocodile tail")
.jpg "Egyptian amulets, from Abydos, probably 18th Dynasty, New Kingdom, c.1555-1337 BC")
.jpg "Double-sided mummy portrait of a young woman, from er-Rubayat in the Faiyum (verso)")
.jpg "The Battlefield Palette, depicting captives and slain victims of battle, the latter preyed upon by wild animals, Late Predynastic to 1st Dynasty, c. 3100 BC")
.jpg "Egyptian sarcophagus covered with hieroglyphics")
.jpg "Papyrus depicting a man being transported on a barque to the afterlife by Thoth, Khepri and another god")
 - (MeisterDrucke-177535).jpg "Chess Piece, Fatamid Dynasty, 10th-12th Century")
.jpg "Egyptian snake-shaped gaming board, used for the serpent game “Mehen”, 3rd century BC")
 - (MeisterDrucke-256744).jpg "Necklace with a Human-Headed Pendant")
_-_(MeisterDrucke-366833).jpg "Murder of St. Wenceslas")
_-_(MeisterDrucke-270126).jpg "Bust of Voltaire, c.1770")
.jpg "Self Portrait at the Mirror")
 - (MeisterDrucke-268671).jpg "Mercury Taking Flight (c.1515)")
.jpg "Aureus coin, from the era of Titus Flavius Vespasianus")
 (see also 154098) - (MeisterDrucke-246902).jpg "The Venus of Arles (marble)")
_-_(MeisterDrucke-571240).jpg "A scene from the series The Town at the End of the World")
 - (MeisterDrucke-206351).jpg "Sauce boat made for the table of Mme. de Pompadour, bearing her coat of arms, Paris")
_and_papyrus-bud_columns_in_the_Peristyle_Cou_-_(MeisterDrucke-417399).jpg "Statues of Ramesses II and Papyrus-Bud Columns in the Peristyle Court, New Kingdom, c.1297-1185 BC")
 - (MeisterDrucke-363851).jpg "Bridge-type Sextants, c.1780")
 - (MeisterDrucke-147417).jpg "St. Matthew, 1419-23")
_New_Kingdom_(wood_vene_-_(MeisterDrucke-439199).jpg "Gaming board, from the Tomb of Tutankhamun, New Kingdom")
.jpg "Zemi")
.jpg "Solidus coin from the time of Theodosius the Great")
_-_(MeisterDrucke-685677).jpg "The Bright House (1st Version)")
.jpg "Almond Blossom")
.jpg "Most Sacred")
.jpg "Pine Forest, left screen")
.jpg "Sailing Ship in the Fog")
.jpg "Construction, 1923")
.jpg "Comrades, 1924")
.jpg "The Grand Canal")
.jpg "The Roses of Heliogabalus")
.jpg "Apple Tree I, 1912")
.jpg "Game of Chess, 1555")
 - (MeisterDrucke-278342).jpg "Portrait of a Woman, 1909")
.jpg "Shichiri Beach in Sagami Province")
.jpg "Farm Garden with Sunflowers, 1905-1906")
.jpg "The Jack Pine, 1917. 1925")

 +43 4257 29415
 support@meisterdrucke.com
 Mo-Do: 7:00 - 16:00 | Fr: 7:00 - 13:00